
You can have your blog up and running in no time with these easy steps. But first, you must actually decide to start your blog. *I am an affiliate of Bluehost. By clicking the links on this page, should you choose to purchase Bluehost hosting and domains, I will make a commission however the price will not be higher than if you don't use my link.
Choose a domain name! The first step is to choose a good domain name for your blog. This is the URL that you will give to people to view your blog. It is the address you see in the address bar of your browser when you land on a website. It is like the address to your blog. Of course, the address you choose needs to be available. You will find that out in step 2.
Go to Bluehost.com.
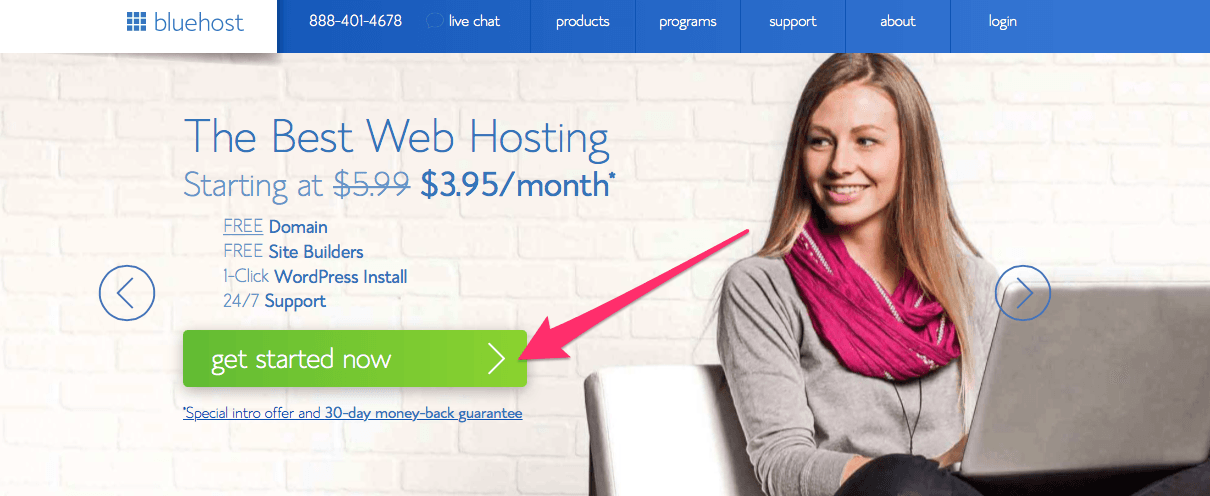
Open up an account by clicking on the button that says: Get Started Now. Here is a screenshot of what the page looks like however, you may land on a different image but the idea is still the same.
On the next screen, you will choose your plan. I recommend the most popular plan at $6.95* per month sale price.
Choose Get Started Now
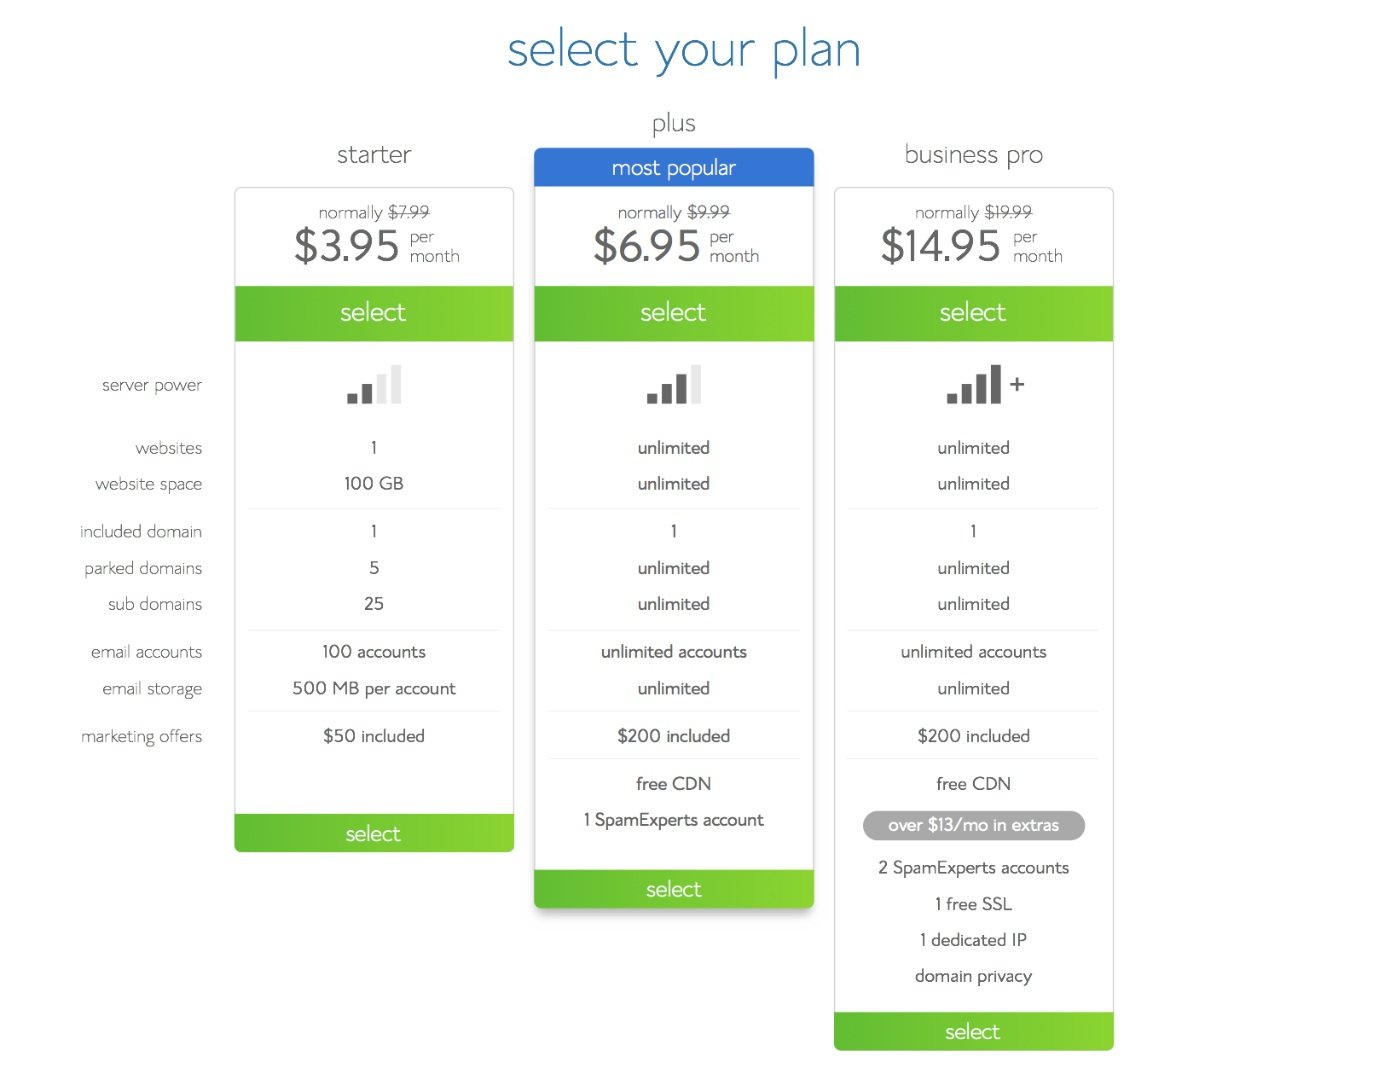
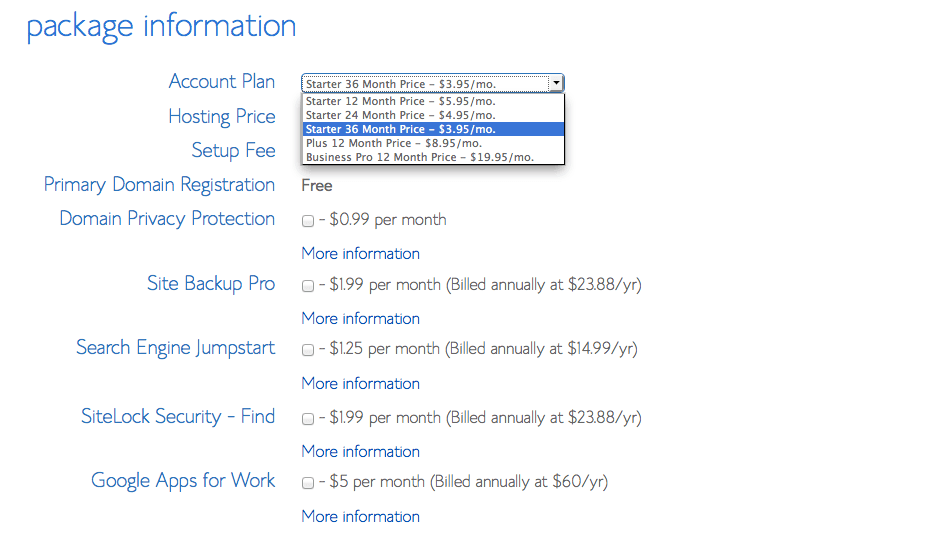
Prices for Bluehost Hosting
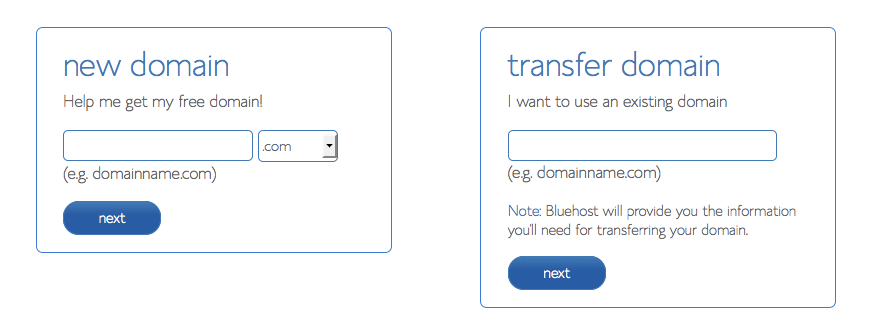
One of the prompts will ask you for a domain name. It is at this time you can get your domain name ( your blog address). I suggest you choose .com or .net. If the system says it is not available, choose another name close to your original desired domain name.
If you already own a domain name on GoDaddy or some other domain registrar you can simply change the Nameservers where your domain is being parked at. This is more advanced and I will do a tutorial on that at another time.
Right now, if you are a newbie, I recommend you follow these simple instructions and keep everything inside of Bluehost for now. Choose "new domain". Enter your desired domain name here. It is FREE for your first year!
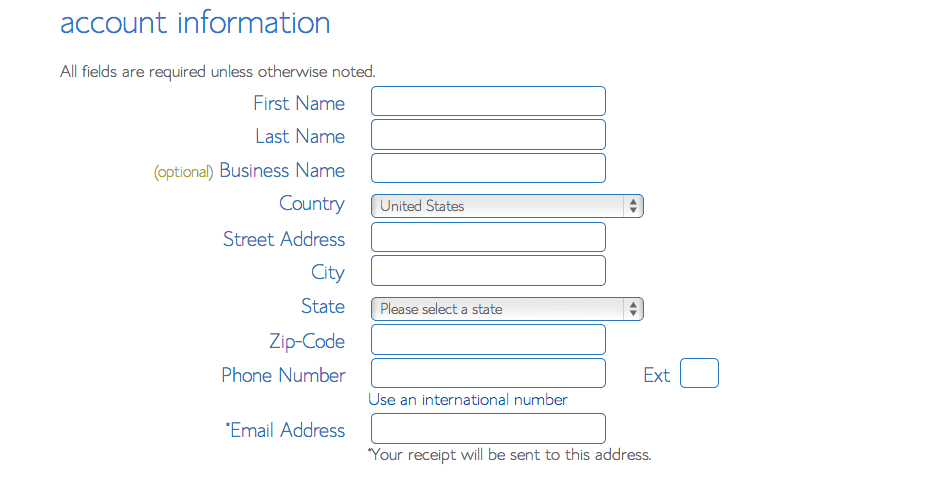
Continue to fill out your personal or business information for the ownership of your domain.
Choosing your plan... the longer you invest in your hosting plan, the lower the price is at Bluehost.
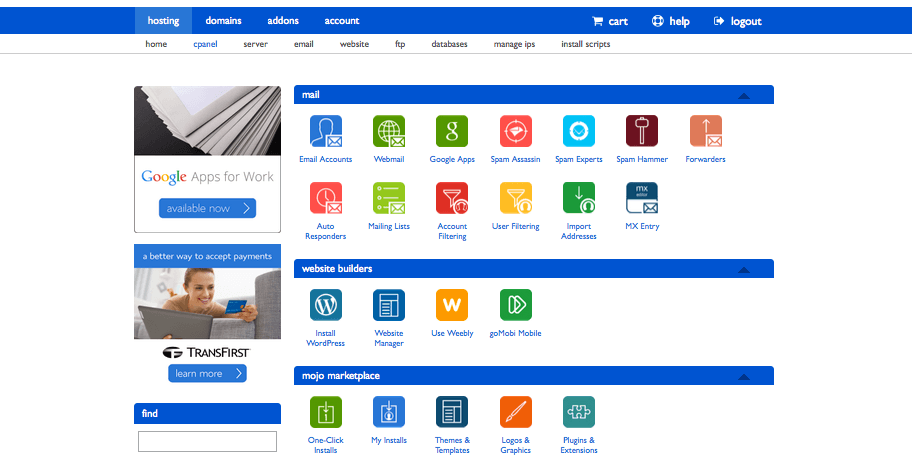
The next step is to set up your website hosting package. This is all included in your plan so no worries about having to buy any add-ons. Now, I will tell you that there are screens that pop up through your process of installing WordPress on your account, just ignore those.
You now will choose "install wordpress". You can see the icon with those words on it. See the screen below to know what it looks like. Don't worry, I added a video step by step tutorial on this page if you need more of a visual tutorial.
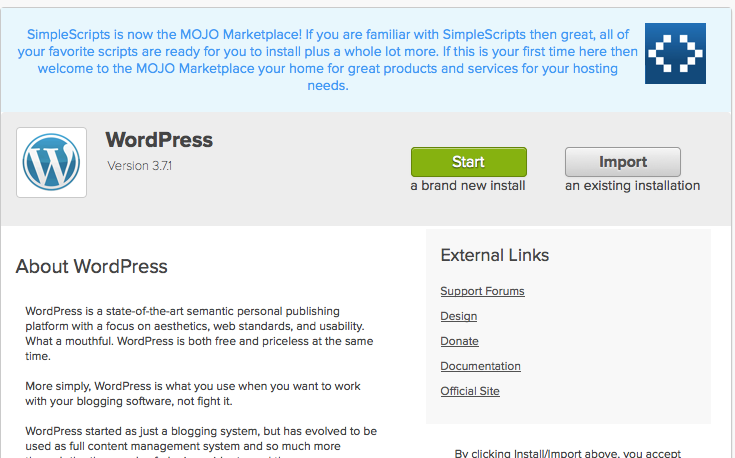
After you click the "install wordpress" icon, you will see a screen like this below. You will now click the green start button that says, "Start":
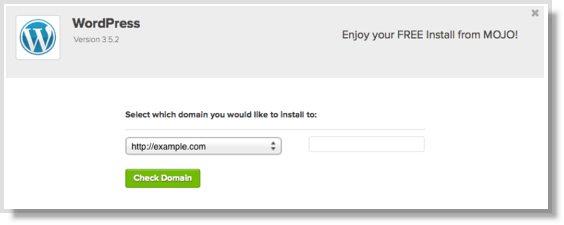
Step Four: After you click the "Start" button another screen will appear. On the next screen you will be given the option of choosing which domain you want to install wordpress on. Now, if you are a newbie you will most likely only have one domain on your new Bluehost account. The option happens in a drop down menu. Simply click on the domain you want to install wordpress on.
This last step is VERY IMPORTANT!
I highly recommend that you do not go the lazy way by leaving these fields in their default mode. Please fill in the fields here:
- Site Name or Title field: Add the name of your blog here- make it keyword rich and attractive to your avatar.
- Admin Username: Do not use your email address. Change this to something you can remember but is not easy to guess by strangers.
- Admin Password: Choose a strong password that is hard for hackers' software to figure out.
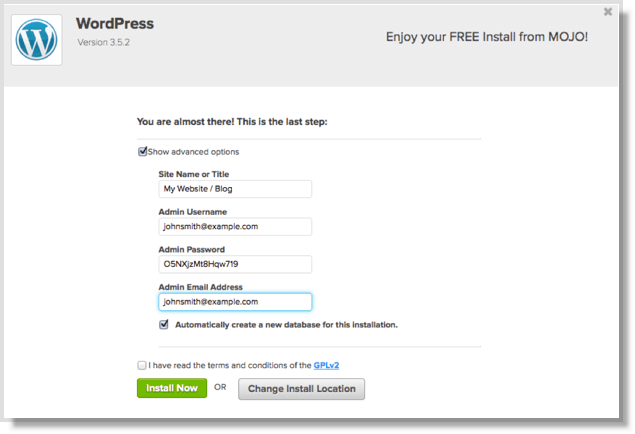
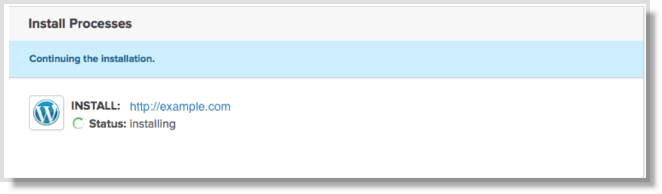
Don't forget to check the box that says you have read the terms and conditions and then click "Install Now". There you go! That is it! It may take a few minutes for the install to finish. Here it the link to Bluehost so you can get started right now.
Here is the video tutorial going through this process of installing WordPress on your blog live so you can see the process in action:
*Prices subject to change without notice. I don't have control over what Bluehost offers. This is what the offer was at the time I wrote this tutorial.